
How many of you have a million empty jars sitting in your kitchen? Today I’m going to be sharing a couple of fun, festive projects to use up those jars, with the help of some Sugru.

We’ve been fans of Sugru in our household for a very very long time- you’re almost guaranteed to find a packet in our fridge behind the cheeses! If you haven’t heard of Sugru, it’s pretty magical! It’s a mouldable glue which sets into a rubber. We originally bought it to repair some phone charger cables but over the years we’ve been using it for more and more projects. From tidying up the cables behind the tv, creating a mini water fountain out of a plant pot and more recently I used it to attach my animal knobs to R’s wall (it works really well as an adhesive to surfaces). But today I’m sharing two projects with you using some empty jars which hopefully encapsulate more fun and less waste! I’ll be showing you how to create a festive hot chocolate jar, a perfect gift this season, and a way to use up the last bits of Sugru in the pack (when you have annoying bits leftover!) Scroll on down for the how-to with step by step photos!
*This is a sponsored post in collaboration with Sugru.
Jump to:
Hot Chocolate Jar
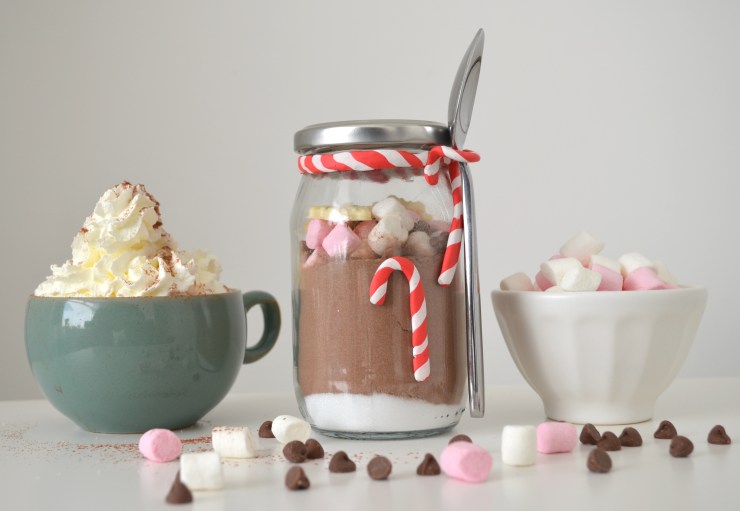
Create this hot chocolate jar as a gift this holiday season. Not only do the Sugru candy canes as a bit of festive charm, but they make a cute spoon holder too.

What you’ll need:
Empty Jar
Hot chocolate ingredients (cocoa, sugar, marshmallows, chocolate chips)
Spoon
Before we start, remember our working time with Sugru is around 30 minutes before it starts setting.
If you want to make your Sugru go a bit further and make a couple of jars, you could skip step 6 and just make the spoon holder candy cane!
Instructions
- Wash and sterilise your jar thoroughly, removing any labels if your jar has any.
2. Roll out the white Sugru into a thin sausage (approx. 4-5mm thick). Top tip- to get it nice and even roll, start with your hands in the middle and slowly move them outwards. Repeat with the red Sugru so it’s matching in length. (This one does stain your surface a bit, nothing that a cloth won’t rub off but something to be aware of!)

3. Take both and gentle press together along the length.

4. Twist the two colours together to create a spiral all the way down to the bottom.

5. Gently roll this again like you did in step 2 to help blend together the colours and create a candy cane stripe.

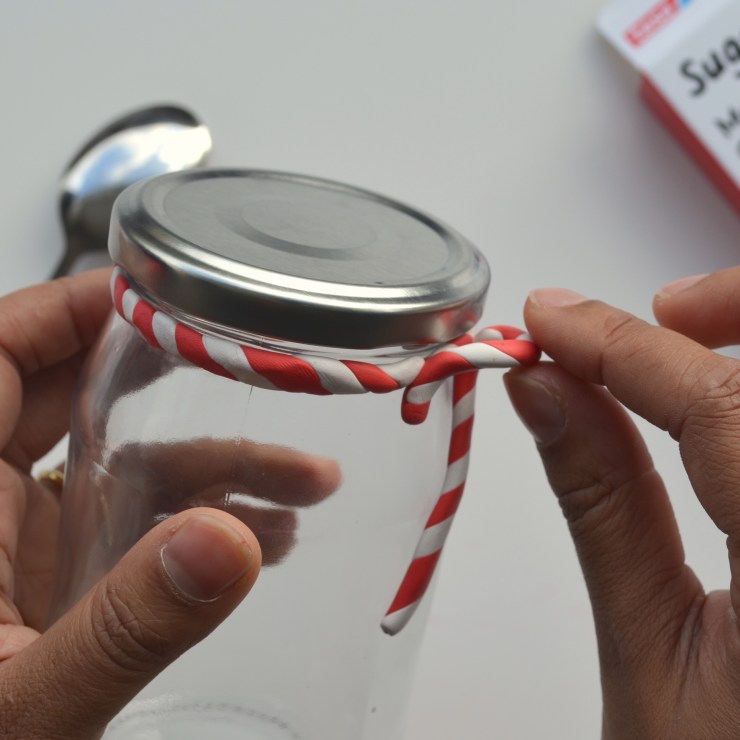
6. Wrap around the candy cane stripe around the top of the jar and press to adhere it to the glass. Pinch off the ends and press together.

7. We’re going to make the candy cane spoon holder. Pop the lid back on for this bit. Create a candy cane shape and press onto the glass, with the curved cane bit overlapping the lid. Press firmly into place.


8. Now remove the lid and gently press the top of the cane away from the lid to create a loop for your spoon. You might want to check it’s a large enough opening for the spoon handle- you can stretch it out slightly if you need to.

9. Use the leftover Sugru to add another candy cane just underneath.

10. Put the jar to the side to set (approx. 12–24 hours)
Once it’s set, you can then fill it up with your hot chocolate mix. You could go the easy route and fill with your favourite hot chocolate powder and toppings or if you like the layered look, use unsweetened cocoa layered with white sugar, topped with mini marshmallows, chocolate chips and even some chocolate snowflakes!


Finish off with some twine and voila! All ready to give this sweet treat to one of the sweets in your life.
This has got to be one of my favourite DIYs ever. There’s just something so satisfying about a project that turns out even better than it was in your head! Plus it’s super easy to make, but looks so charming. You’d never guess that this was an old jar right?
Children’s Den Light

My daughter loves to create a blanket den, but with these darker days she’s in need of a little light in there! So I created a little jar lantern for her to use to light up her den. The LED candle gives a warm flicker and she loves the effect, and the jar keeps it away from her little hands. Plus it’s a great simple project that kids can involved with in making and uses up those small bits of Sugru that might be reaching the end of it’s fridge life!
What you’ll need:
Sugru in White (half a pack), Brown (small amount) and Orange (small amount)
Empty Jar
LED faux candle

Instructions
1. We’re working with the jar upside down. Create a ‘snowscape’ by pressing and smearing the Sugru along the glass. A little goes a long way! You can really spread it around, and as it stretches it creates a lovely rustic texture.


2. Add small spots to create snowfall.

3. Add a bit of whimsy by making a character to go on top! You can change this up depending on what colours you have to hand, but a snowman is super simple to make. Create 3 balls in the white with each one being slightly bigger than the last.

4. Create the eyes and buttons using a pencil/toothpick to make some holes. Add two little arms in the brown and orange to make the nose!


5. Attach the LED candle to the inside of the lid.


Go get those jars…

I love little projects like these that take the ordinary and make them a little more special. Plus it’s given these jars a whole new lease of life. Who wouldn’t love to receive a hot chocolate jar with a spoon holder! Sugru works so perfectly for these projects is that it’s waterproof, machine-washable and dishwasher-safe. Win-win.
What do you think of the projects? I hope you’ve been inspired to try one, or both, of these out or at least look at your humble jars a little differently.

If you do give it a go, do tag me! And don’t forget to head back to my blog in the new year, when I’ll be showing you how I re-used an old photo frame to get myself organised!
love,

What lovely ideas, and to think I only use my surplus jam jars to store lentils!